
In this guide, bassoonist Brittany McCorriston runs through the most important tools to have when first learning to adjust bassoon reeds.
Reed adjusting is the act of changing a reed in order to better fit a player’s individual style or a particular musical situation. Reed adjusting is often learned before reed making, and has to do with making specific, targeted changes to a reed in order to accomplish a specific goal. Whereas reed making is making a reed from the beginning, and includes both the forming stages and initial scrapes.
There are many reasons why one might need to adjust their reed for example,
- The reed is not playing in tune, and in general is playing either too sharp or too flat
- To achieve greater ease of playing in a specific register
- To fix intonation in a specific register or note
- To increase/decrease resistance in a reed
A player may choose to adjust a reed either because it’s not working for their own embouchure and playing style, or to make a specific musical passage easier to play. For example, a beginner may need a less resistant reed in order to produce a sound and not get fatigued too quickly. Or, you might need a reed that plays low notes for an extended period of time in tune with little resistance and it doesn’t matter if the extreme upper register doesn’t project because you won’t be playing in that register anyway (second bassoons I’m thinking of you here).
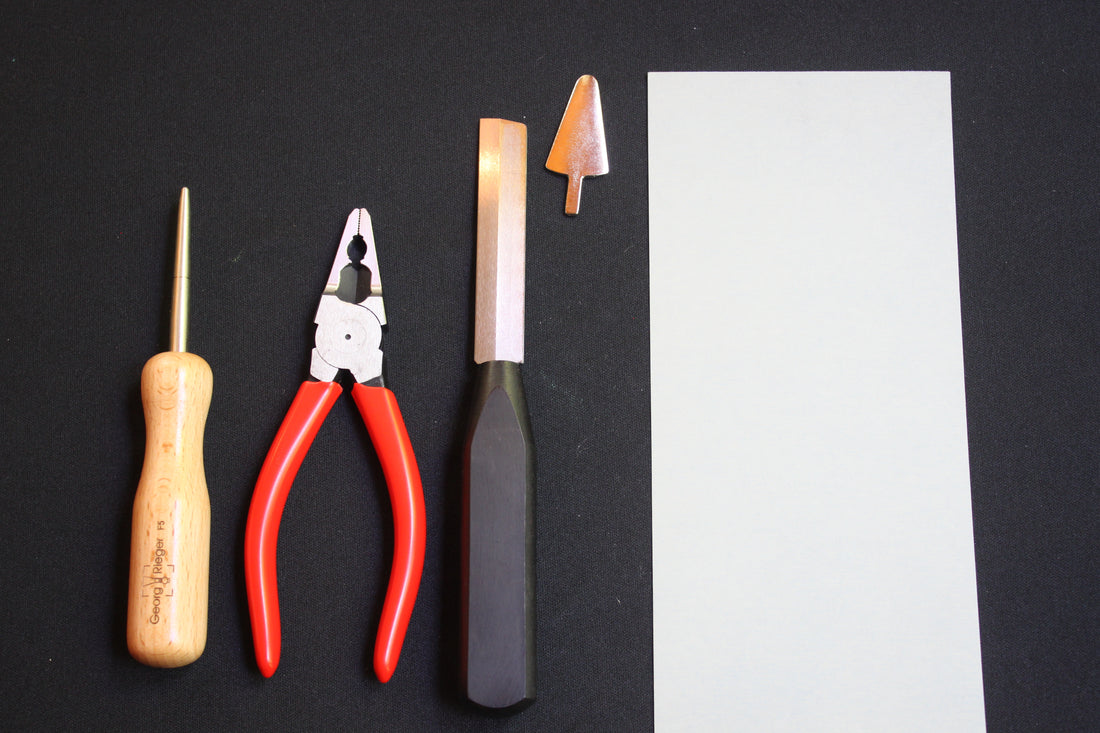
There are many different tools that one can use to adjust reeds, and some do come down to personal preference, but here’s a list of some of the most common, that are absolutely essential and what they’re used for.
1. Plaque
Plaques come in either the metal or plastic variety, and they are inserted in between the two blades of a reed in order to protect the blades and keep it from cracking as you scrape. You should always be working with a plaque inserted even if not working on the tip of the reed. Clear and solid plaques will look very different when inserted into the reed so it’s important to try both and see which one you prefer.

Fig. 1. Bassoon Plaque Comparison
2. Mandrel
Mandrels act as an extension of the reed, they are used to provide support and comfort while you’re scraping. Although reed scraping can be done without a mandrel, it is important to learn with one in the beginning as it helps facilitate proper scraping technique, increases accuracy, and minimizes risk for cracking.

Fig. 2. Rieger F5 Bassoon Mandrel
There are two main types of mandrels, regular and forming. Forming mandrels are used for reed making and have a different shape/contour. When purchasing your first mandrel be sure to purchase a regular one. Forming mandrels are typically labeled as such.
3. Scraping Knife
If you ask 10 different reed players to recommend a scraping knife you will probably get 10 different answers. A scraping knife is probably one of the most varied items one can buy. Scraping knives are used to take cane off of certain parts of the reed. A reed will respond differently depending on where and how much cane is taken off a reed.
The blade of a knife can have different cuts, and some are only made for right or left handed players. My first knife and the one I recommend to all beginners is the Rigotti Double Hollow Ground Knife (it’s lefty friendly).

Fig. 3. Rigotti Double Hollow Ground Scraping Knife
4. Spring-Loaded Needle Nose Pliers
Pliers are used to adjust the opening/shape of the wires as well as their tightness. Pinching closed or squeezing open the first and second wires on a bassoon reed will affect the size and shape of the tip opening. I always recommend that your first pair of pliers is spring loaded meaning they open automatically when not being squeezed as they’re a little easier to hold and grab things with.
The pliers that are sold on the RSC website are a little more expensive than your typical hardware store pliers because they have additional apparatuses used during the forming process. If purchasing from a hardware store make sure that the end of the pliers is narrow enough to grab and maneuver wire as well as consider a pair without teeth. Using a pair with teeth can wear down wire and cause it to snap prematurely, especially while tightening and loosening wires.

Fig. 4. Different Types of Pliers Characteristics
5. Wet-Dry Sandpaper
Sandpaper is used to smooth out a reed after scraping as well as thin the tip of the reed by placing the sandpaper on a hard surface and rubbing the tip against it at a 45 degree angle. Sandpaper comes in various grits, the higher the number the more fine it is, the lower the number the coarser it is. It is important to purchase wet-dry sandpaper as it is water-resistant. Regular sandpaper will disintegrate since you’re working with wet wood.
You can identify wet-dry sandpaper by it’s grey/black colour and bassoonists typically use a grit range from 400-1500.

Fig. 5. Wet-Dry Sandpaper
That’s it for my list of essential tools. I recommend these items as the bare minimum for beginners. It’s standard for double reed players to carry a set of tools with them at all times, so getting some kind of carrying case is also useful. An old make-up bag or pencil case works really well.
Remember, reed adjusting is about making specific changes to accomplish a specific goal. The tools listed here will allow you to accomplish a wide range of adjustments and are great to get started with. However, there are many more tools that are made for a specific task (Ex. a reamer) so stay tuned for our expanded list of reed adjustment tools. In the meantime be sure to follow us on social media @ReedSuppliesCanada and let us know in the comments if you have any questions or tools you want covered in upcoming posts!