
Troubleshooting for New Oboists
A Guide for Oboists and Ensemble Teachers
Are you just beginning your oboe journey and encountering some unexpected issues? Are some notes (or all of them) not coming out and you can’t figure out why? You’ve come to the right place!
In this quick troubleshooting guide, oboist Anna Betuzzi will run through some common issues and what you can do to fix them. Band and orchestra teachers, this guide is made for you too.
If you’re experiencing any issues when you try to play your instrument, simply run through these two checklists so you can identify (and fix) the exact problem!
5-Point Reed Checklist:
The first thing to check is whether your reed is working properly.
1. Is your reed soaked?
Oboe reeds need to be soaked in water before they can be played. You will need a small cup of water. Simply dip the wooden portion of the reed in the water all the way up to the thread. Then wait for 3-5 minutes. After this time, your reed will be sufficiently soaked and ready to play.
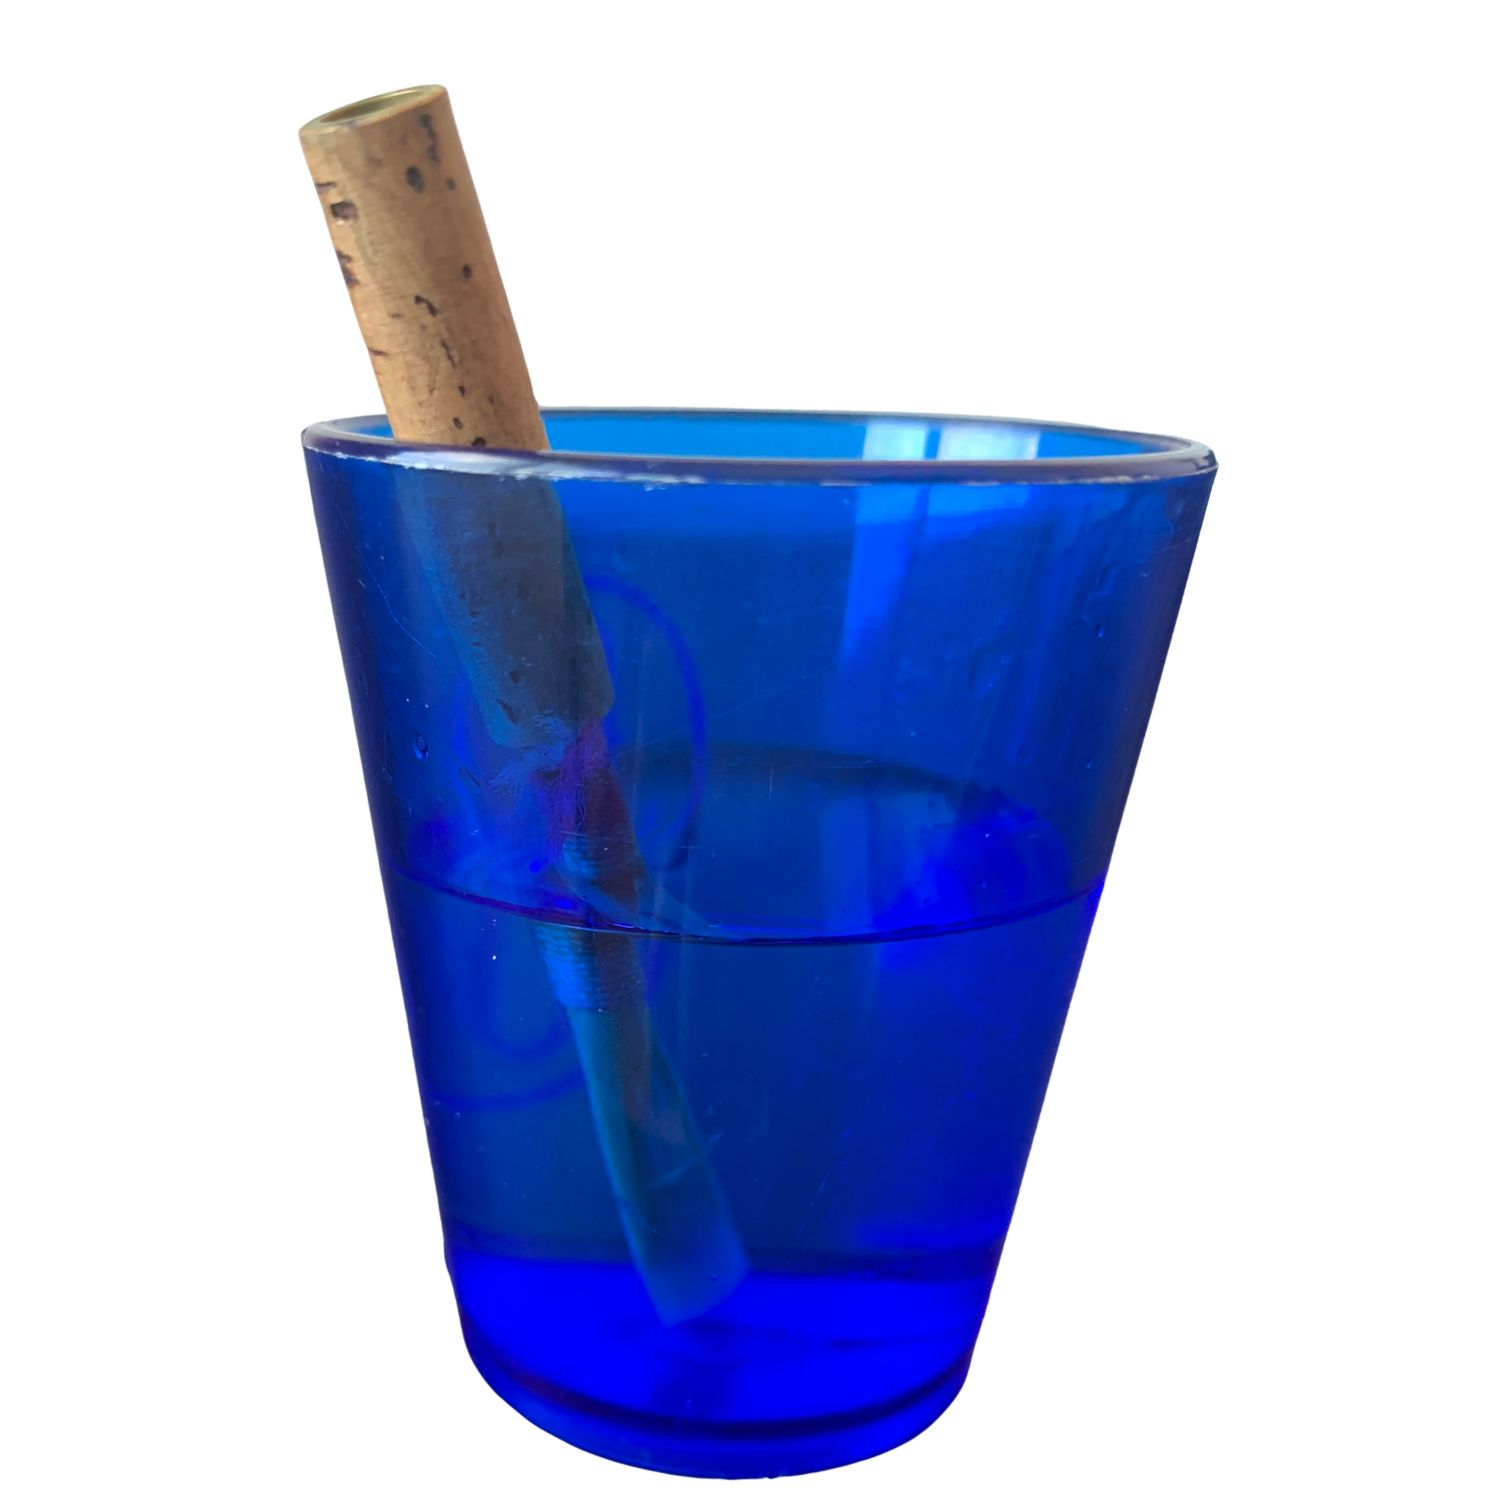
Unlike clarinet and saxophone reeds, oboe reeds cannot be soaked using saliva. This is because both the inside and the outside surfaces of the reed need to be in contact with the water. Soaking in saliva also wears out the reed faster!
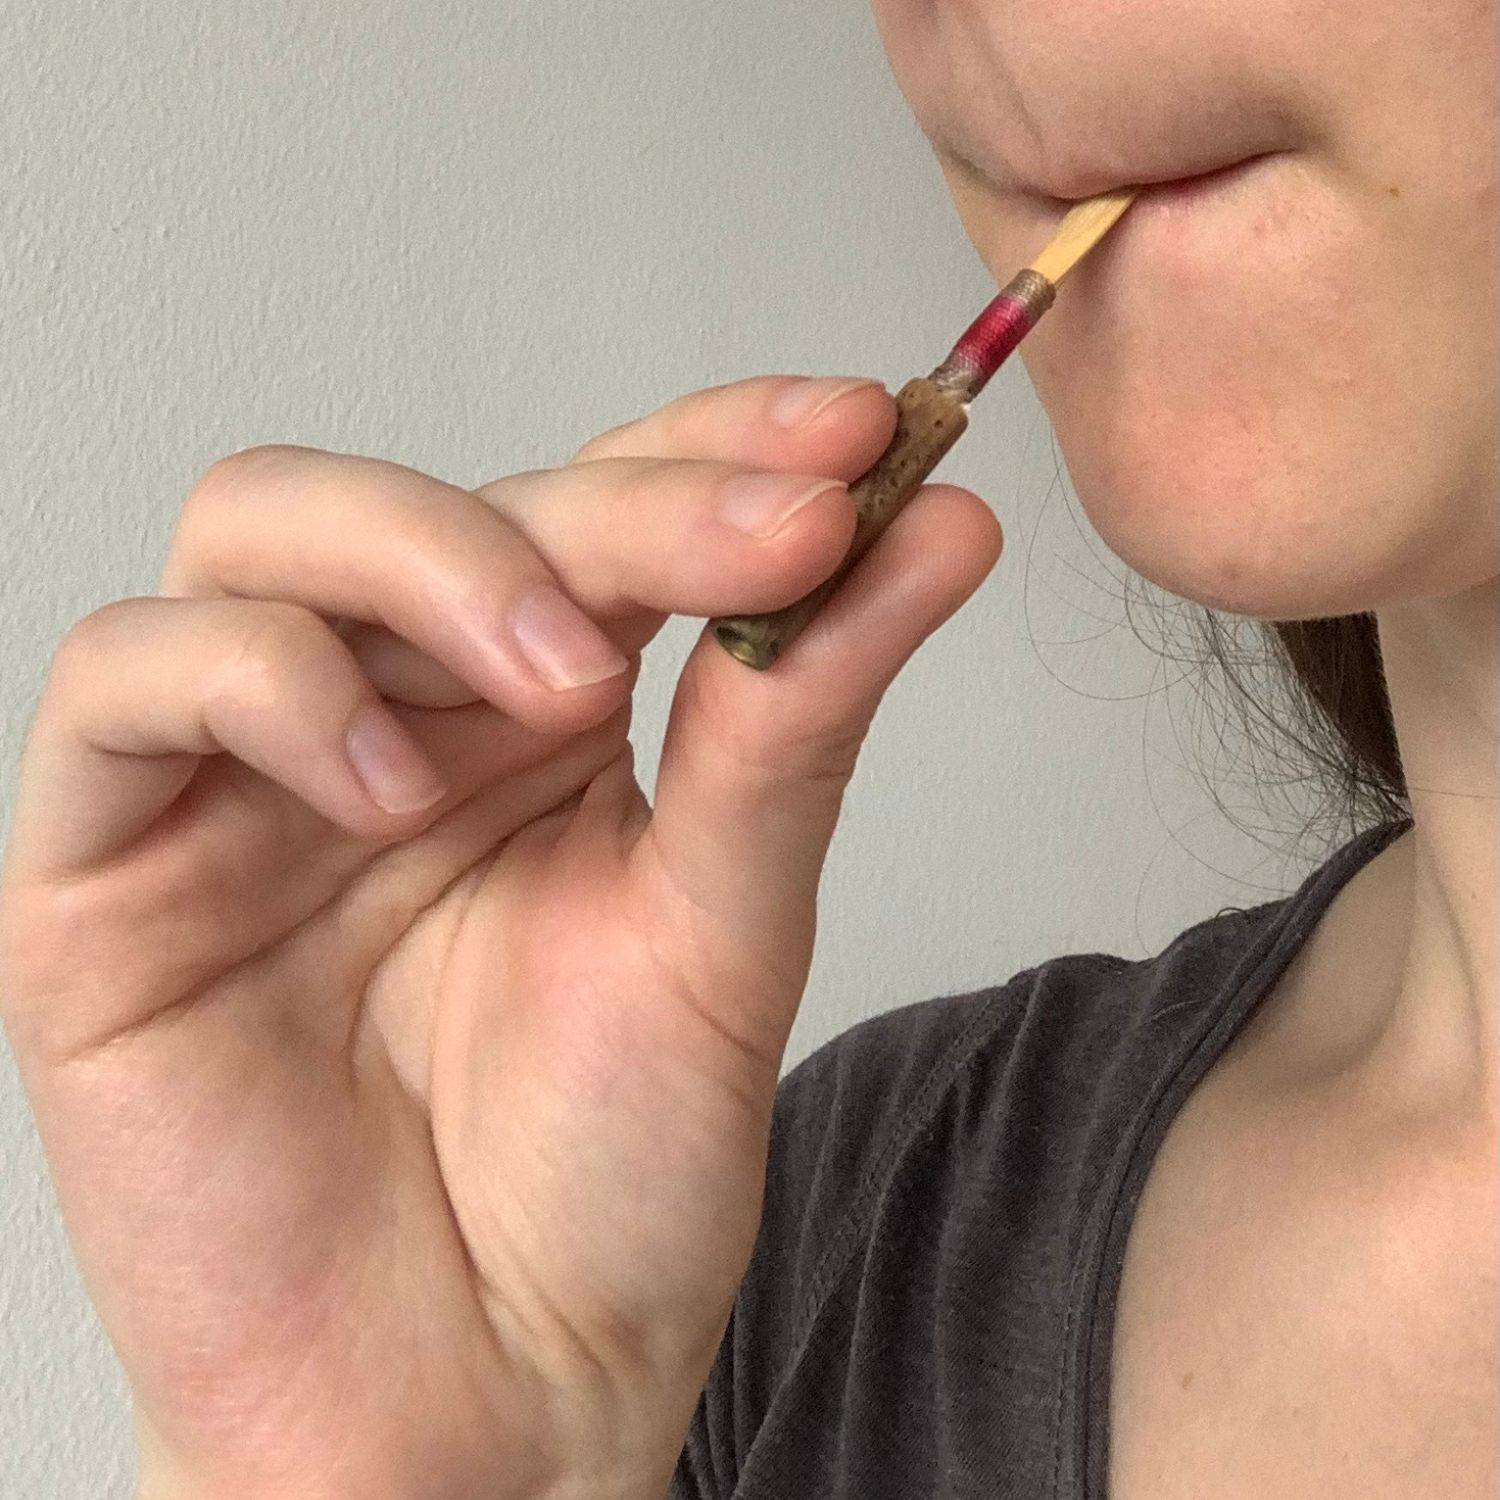
2. Does your reed peep?
Peeping the reed means playing just the reed by itself, without the oboe. Place your lips on the reed in a normal playing position, and blow into the reed. It should sound like one single note, like this:
If the peep doesn’t come out properly, your reed may need to be adjusted, or you might just need a new reed. Ask your ensemble teacher or private oboe teacher for help, and you can also check out our article on Troubleshooting Tips for Oboe Reeds for a more thorough explanation.
3. Does your reed crow?
Crowing the reed means placing the lips on top of the thread portion of the reed, with the wooden portion entirely inside the mouth. While in this position, blow into the reed. This should create a raucous, noisy sound with multiple pitches present, like this:
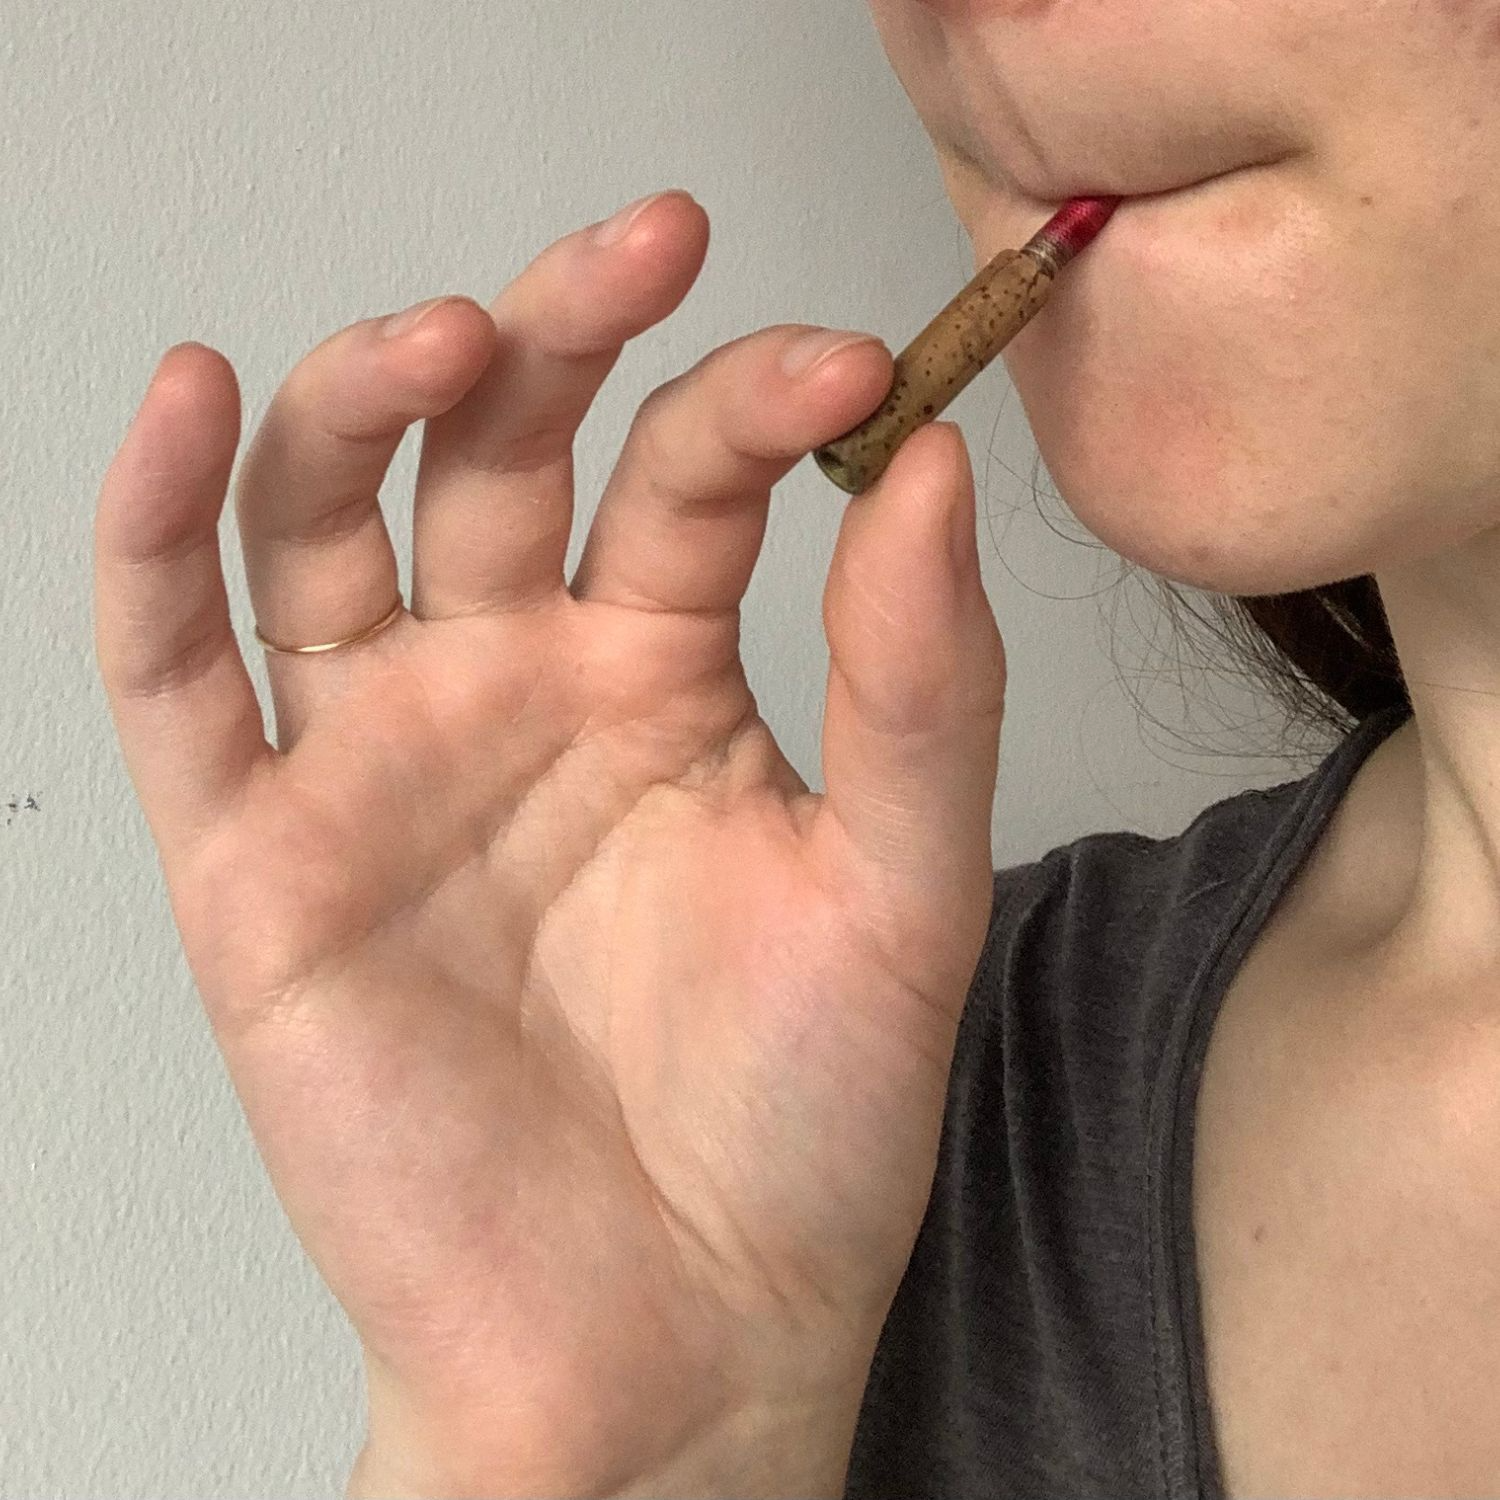
When you crow your reed, if it only creates one pitch (similar to the peep sound), that means your reed is likely too old. You will need to get a new one.
Reeds really only last about 1-2 months of playing. So if it’s been longer than that, or if you have an old mystery reed or an old hand-me-down reed, then it’s definitely time for a new reed!
4. Does your reed leak?
If your reed leaks, the high and low notes on the oboe will not sound properly. To check for leaks, hold the reed in your hands, cover the cork end with a finger, and blow into it as if you were playing normally, like this:
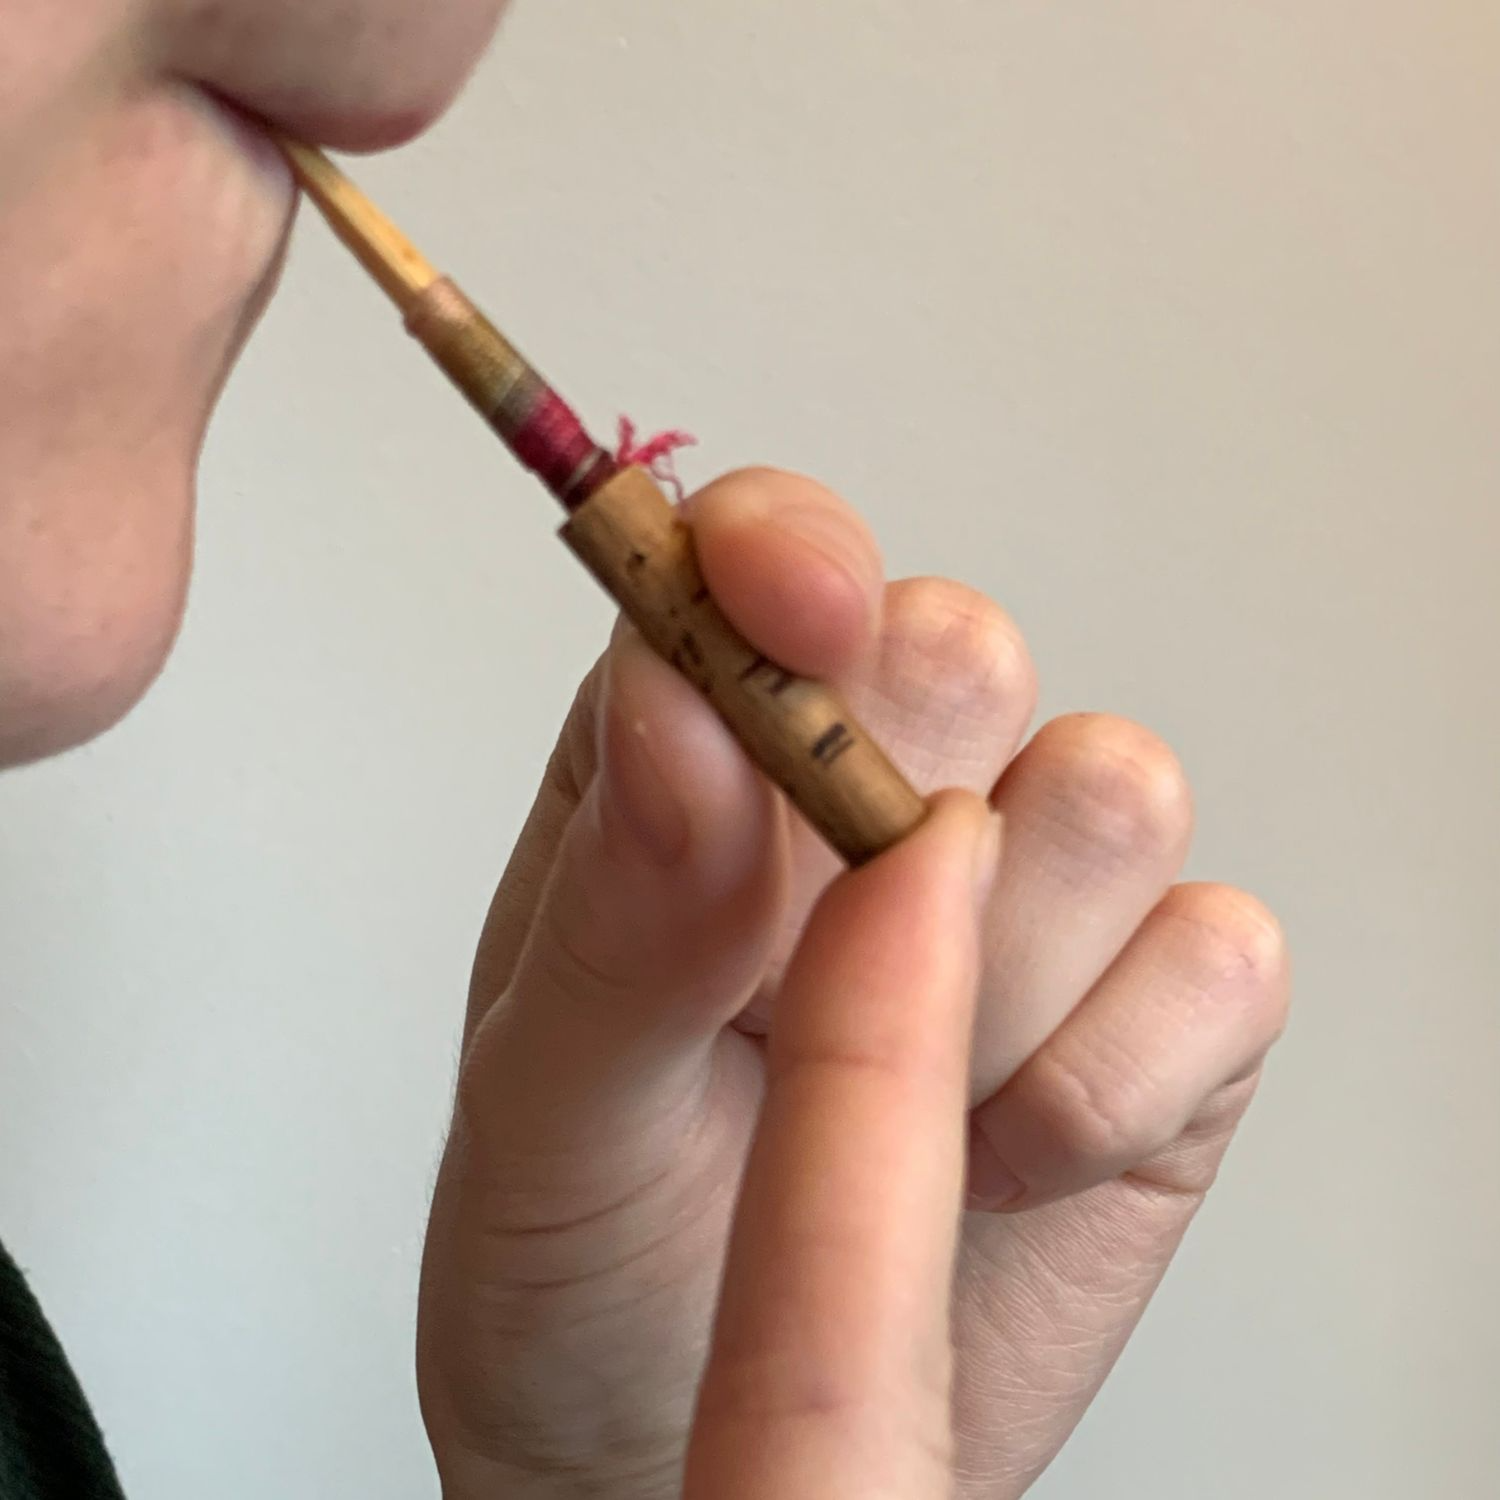
If you feel air leaking, try soaking the reed for a longer time or playing with your lips closer to the thread of the reed. If it still leaks, try cutting out and wrapping a piece of fishskin sealing paper or cling wrap tightly around the leak!
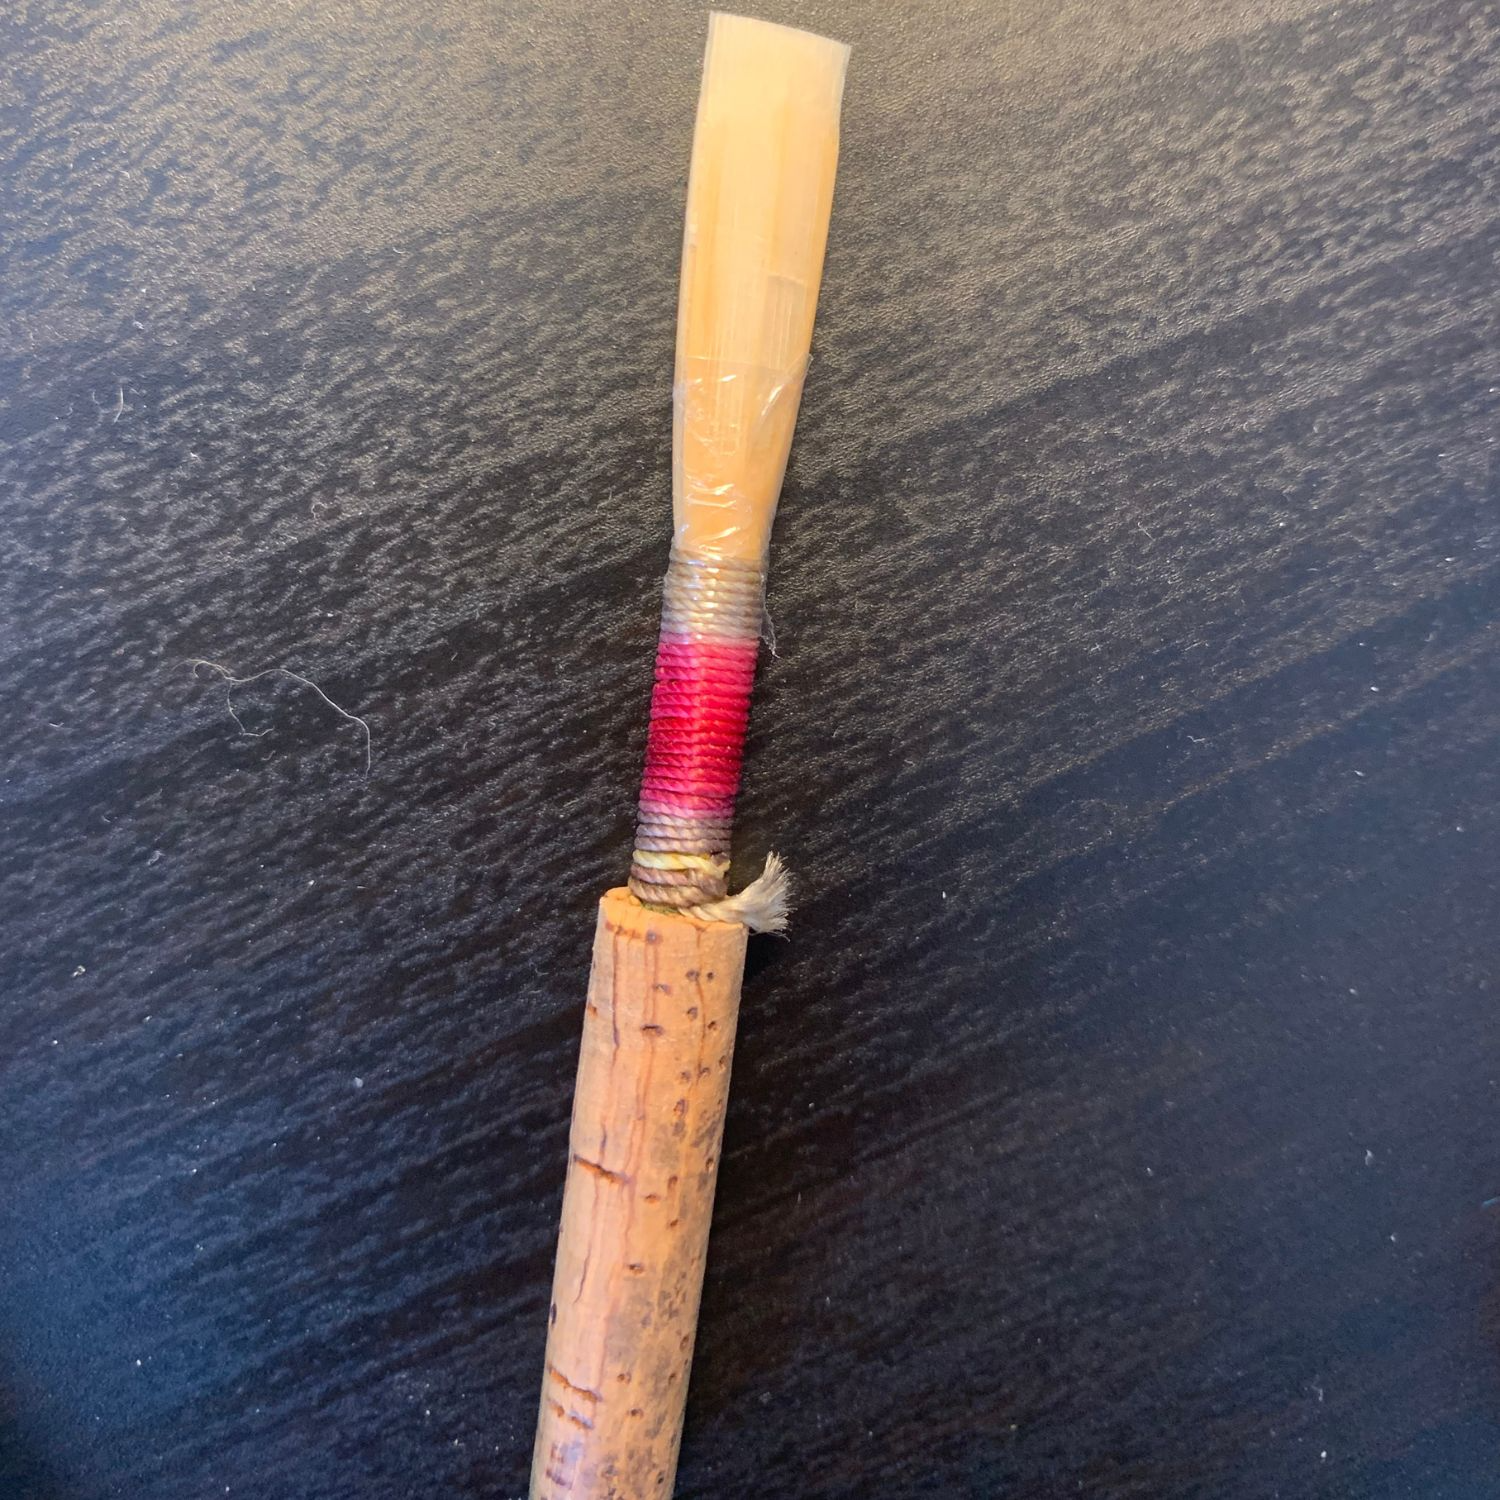
5. Is your reed damaged?
Cracks or chips in the wood of the reed can cause it to stop working properly. Look at your reed under a strong light or lamp (such as the flashlight function on your cell phone), and check closely for any signs of damage. If the reed is damaged in any way, it’s time for a new one!
5-Point Playing Checklist:
Next, you’ll need to make sure your playing setup and technique are correct.
1. Is your reed pushed all the way in?
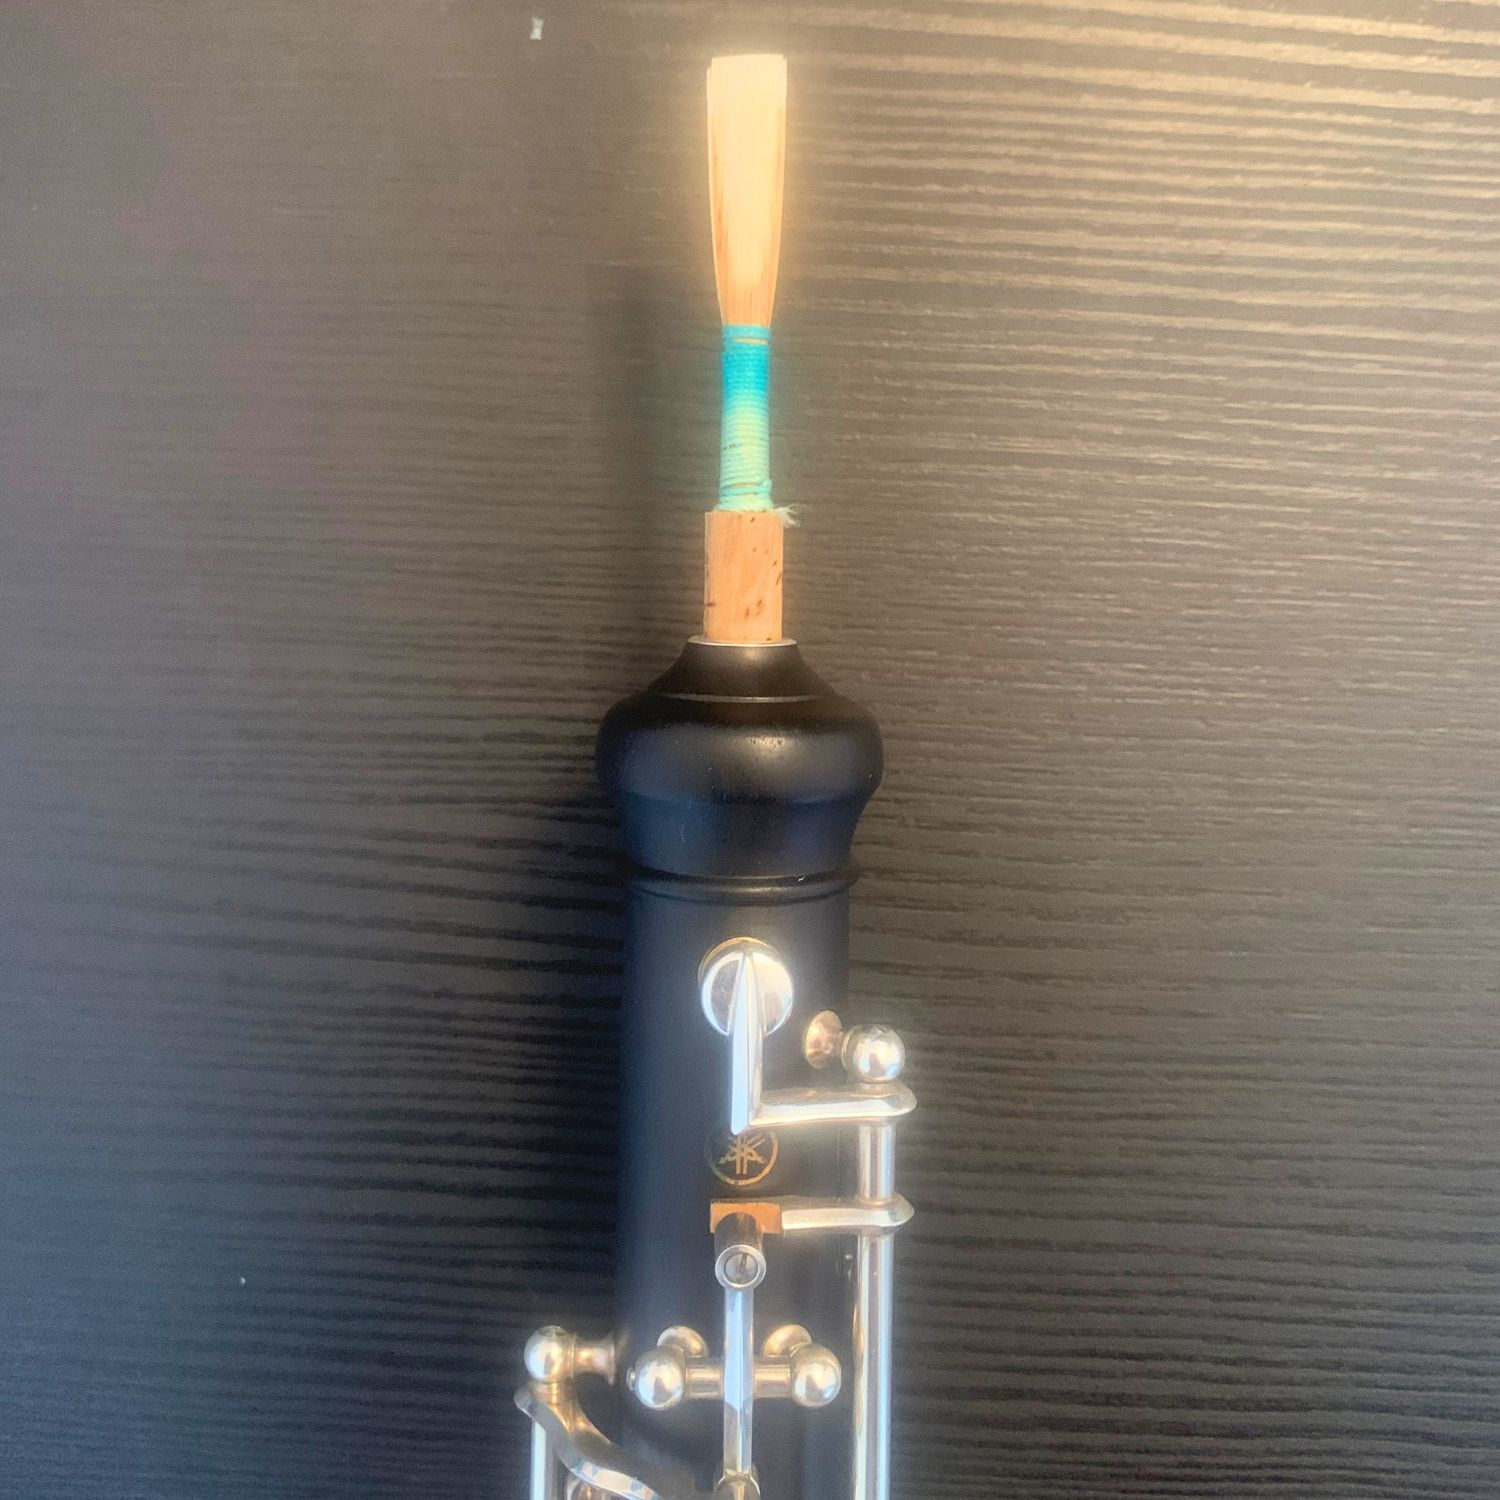
The reed should always be pushed all the way to the bottom of the reed well, which is the metal hole at the top of the oboe. If your reed isn’t pushed all the way into the oboe, your sound will be too low, and the reed may also leak. If it’s a tight fit, try rocking the reed side to side as you push it into the oboe. Once the reed reaches the bottom, you will feel it. It should look like this:
2. Do you have good posture?
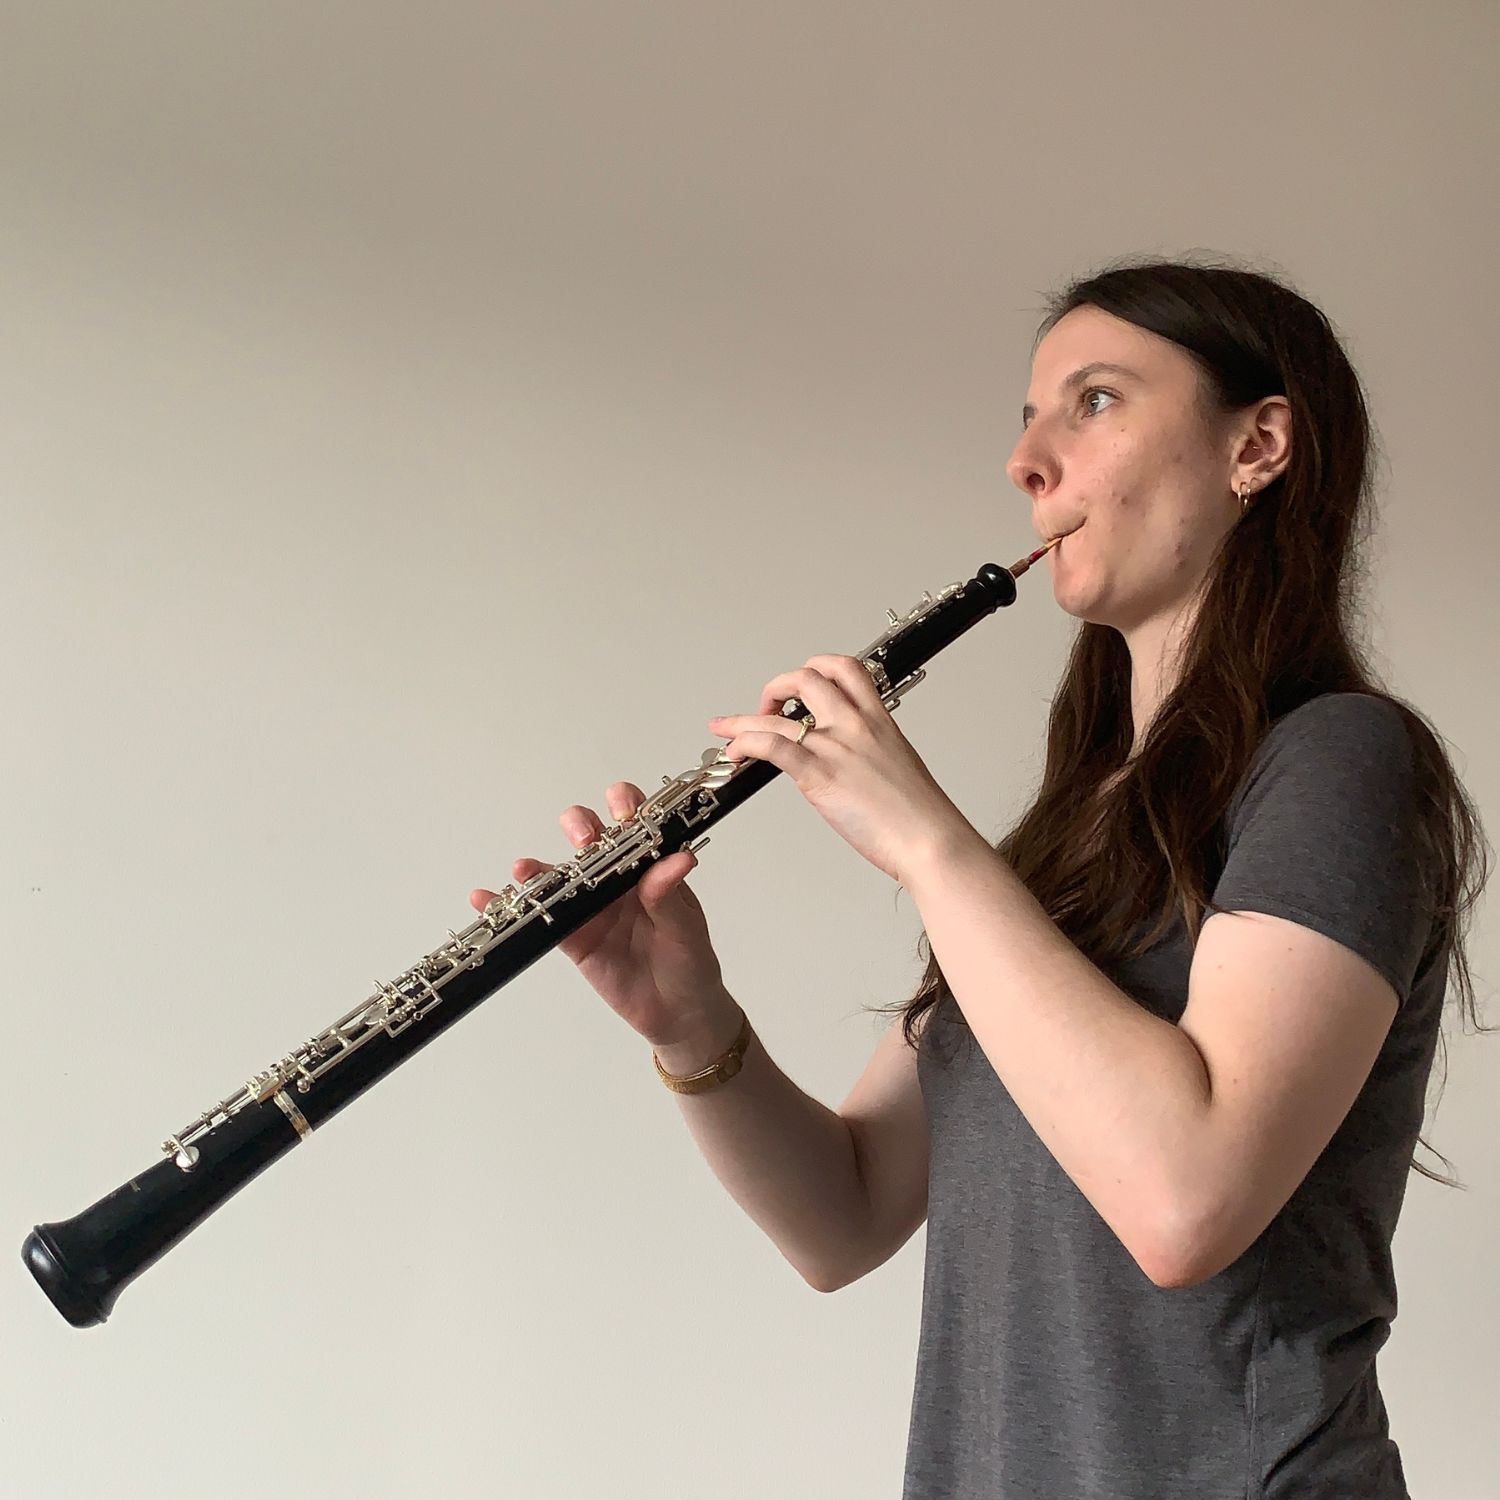
Without good playing posture, your air will be unable to efficiently travel into the oboe. Make sure you are sitting (or standing) straight, with your head upright, and the bottom of your jawbone more or less level with the floor.
Oboes are played at a 45 degree angle or slightly higher. This is unlike clarinets, which are angled more towards the floor. Here’s the correct playing angle for oboe:
3. Are your fingers fully covering the required holes?
Some of the keys on the oboe have a hole in the middle, which needs to be covered completely depending on what note you are playing. Pay extra attention that your fingers cover these holes in particular (when required by the note, of course):
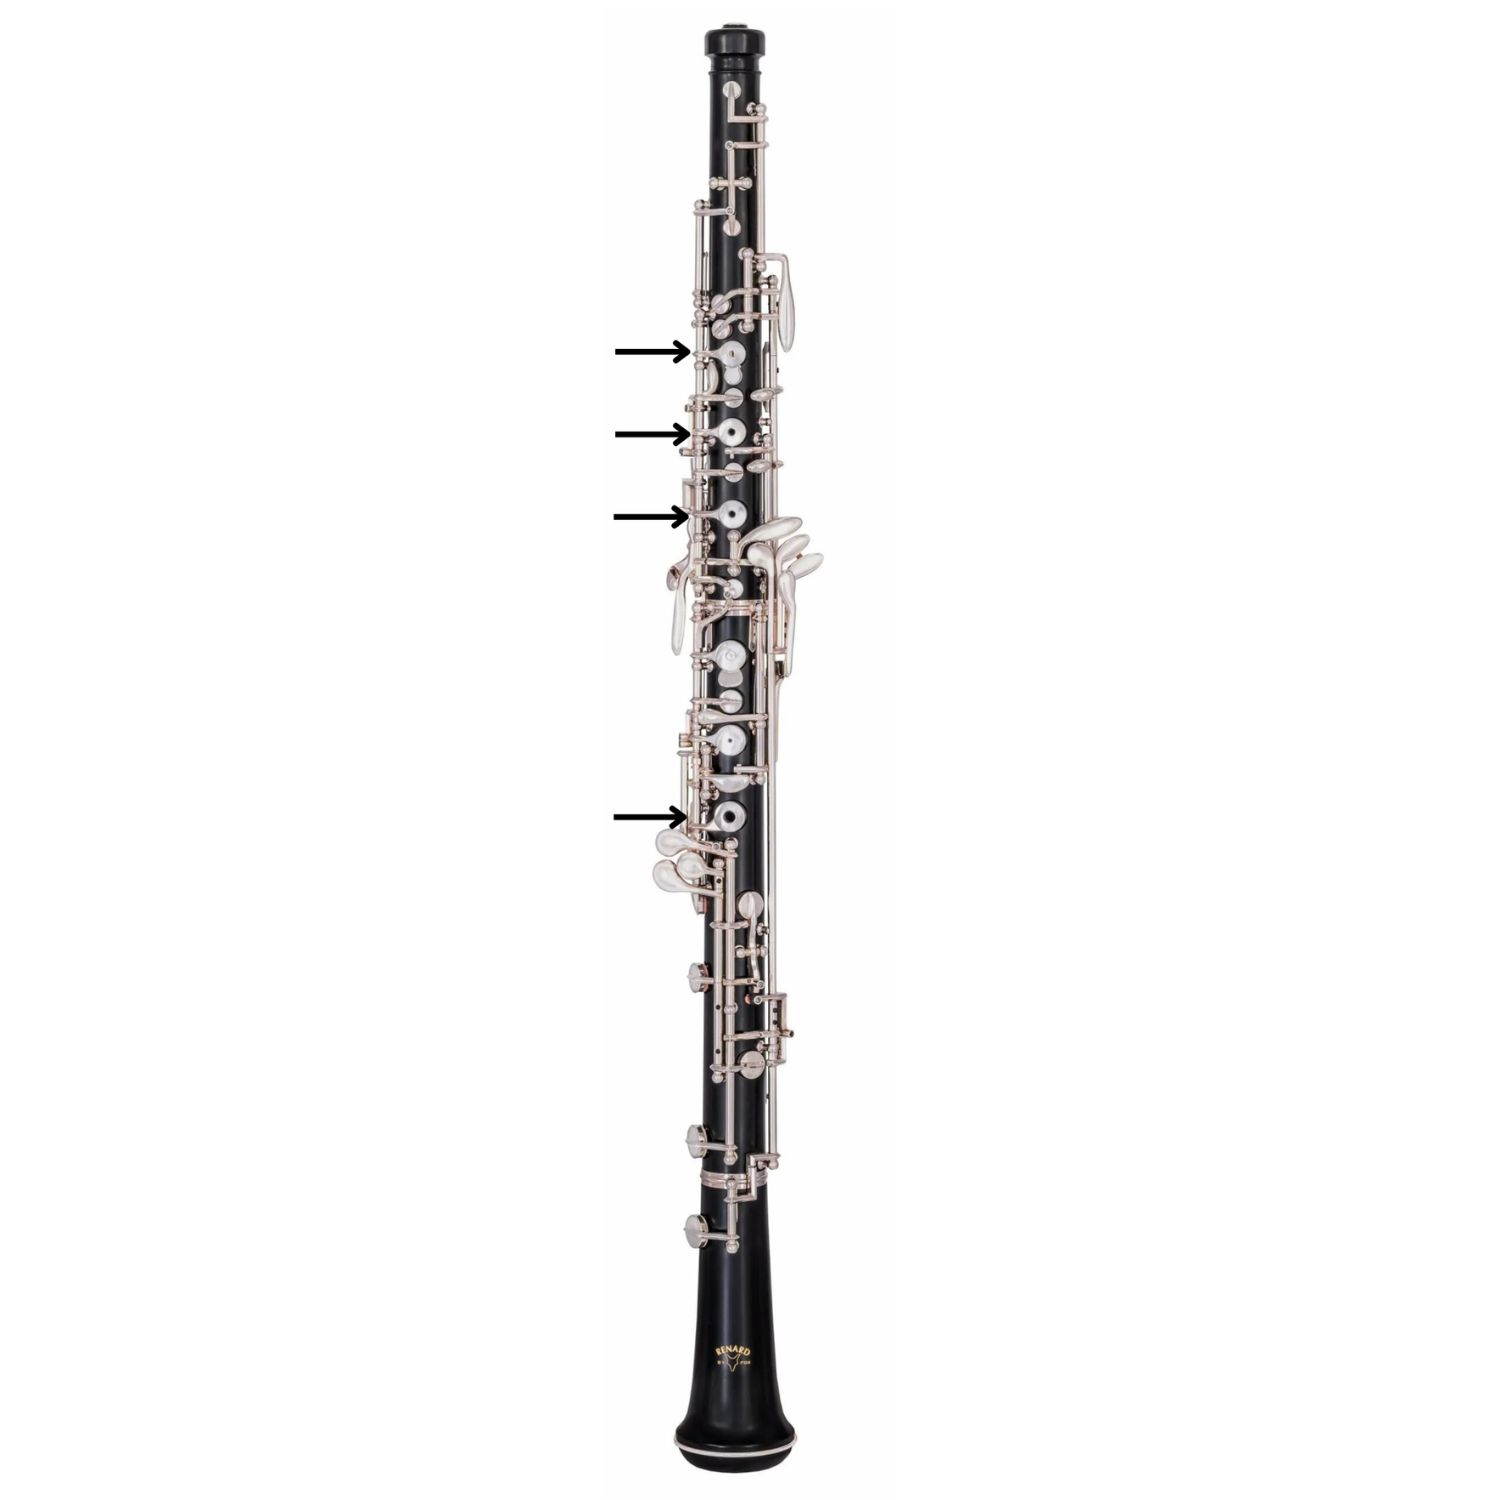
As a side note, not all oboe models will have an open hole in that lowest key. So, you only need to worry about covering it if your oboe does have an open hole there!
If you’re having trouble covering the open holes, try curving your fingers more. Gently curved fingers are easier to control!
4. Are you pressing any extra keys?
A very common issue for new oboists is accidentally pressing extra keys on the oboe, which results in the notes not sounding properly. Review your fingering chart carefully, and ensure you’re not pressing anything extra. If you’re looking for a straightforward fingering chart, Reed Supplies Canada offers Fingering Charts you can download for free!
Here’s a diagram of some keys that are often pressed unintentionally:
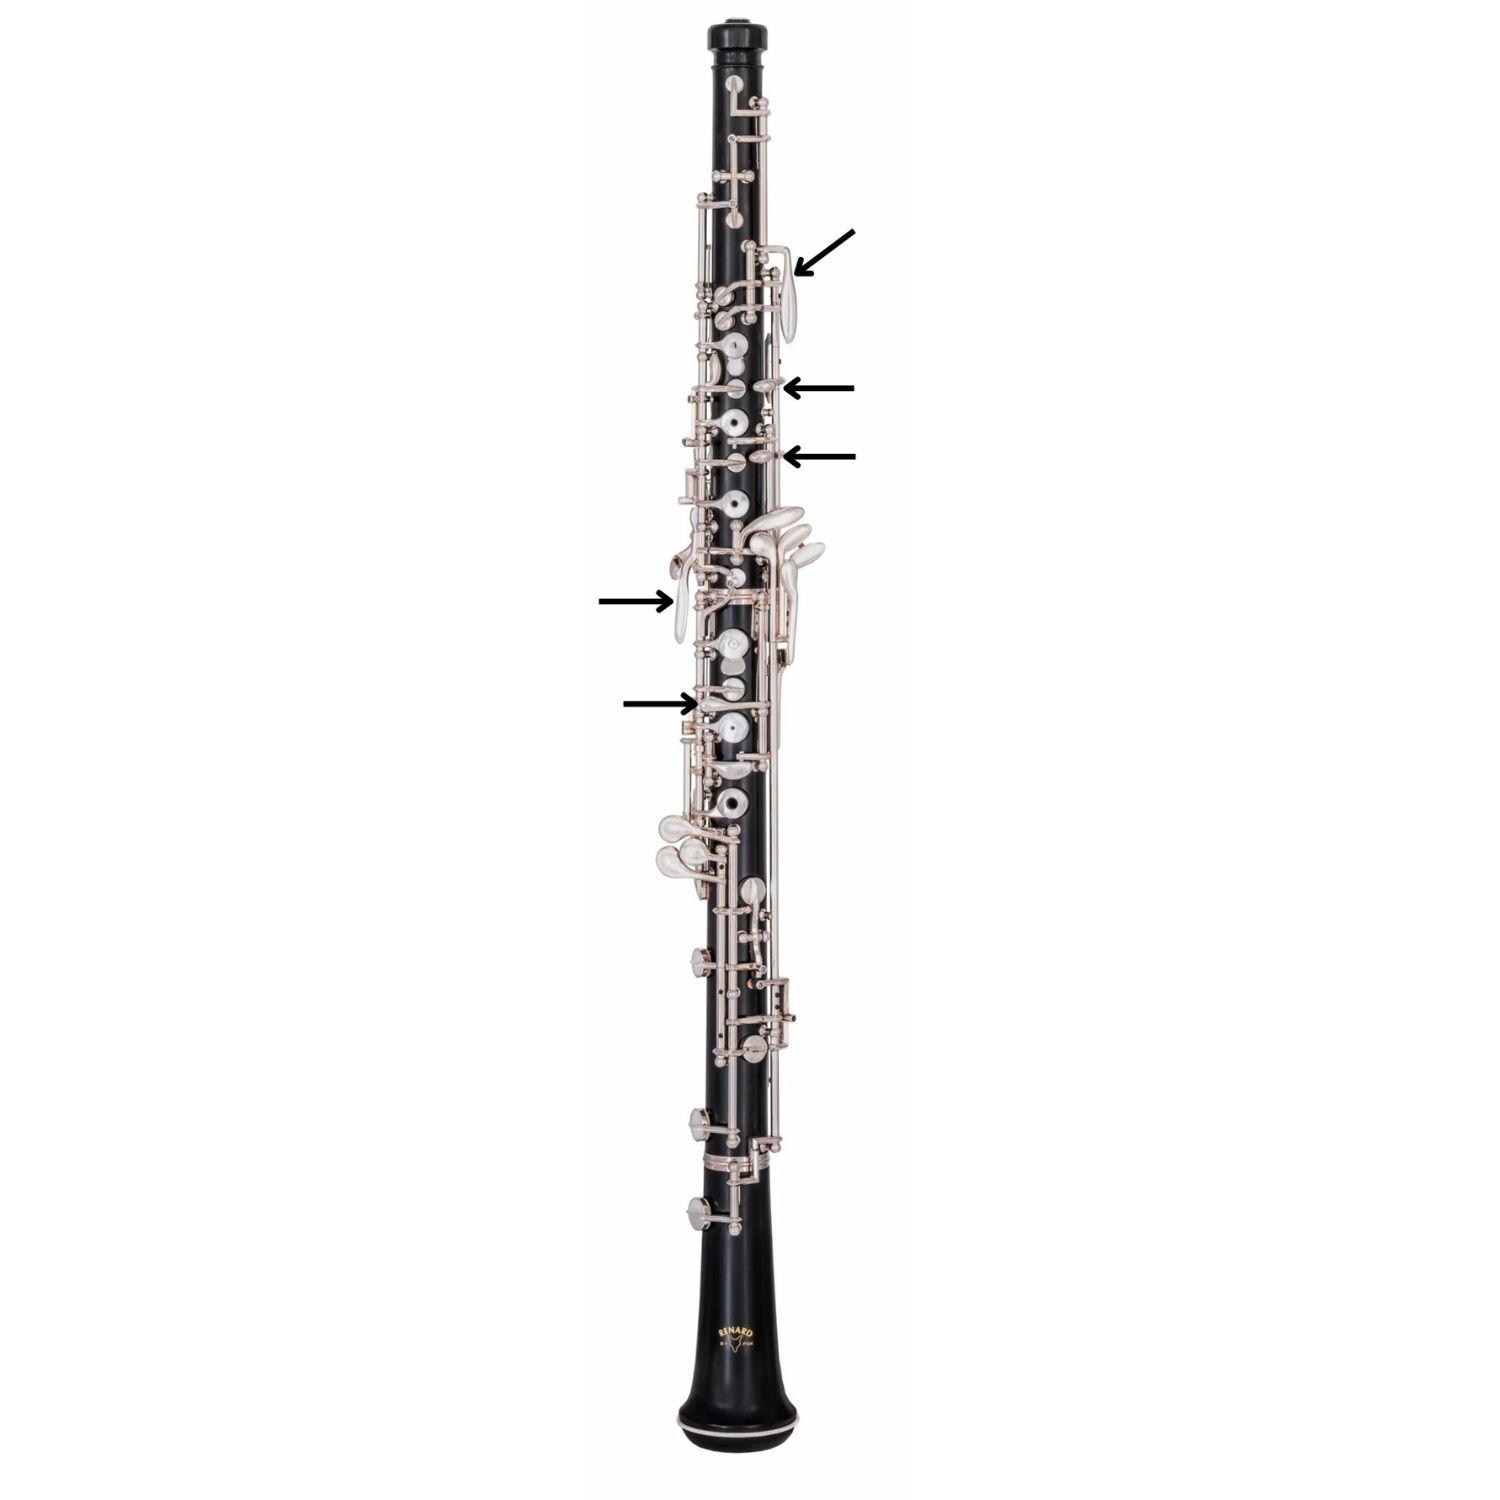
If you find yourself often mistakenly pressing a particular key, try moving the position of your hands slightly or curving your fingers more to reduce the risk!
5. Are you using the right amount of air?
Depending on whether or not you have any prior experience playing wind instruments, you might initially use either too much or too little air when you play the oboe for the first time. Playing the oboe is similar to blowing a steady stream of air through a tiny straw. Your air needs to be fast and have consistent air pressure, but the actual quantity of air is considerably less than other wind instruments.
When you play, be sure to feel your abdominal and core muscles activating, but don’t strain to the point where you feel any tension in your shoulders or neck.
What Do I Do if it’s Still Not Working?
If you’ve completed this entire checklist and your oboe is still not working properly, the instrument may need to be repaired by an instrument repair technician.
If you know any other oboists who have more experience, ask them to try your oboe and see if it works for them. If it doesn’t work for them either, you’ll definitely need to have your oboe repaired. If it does work for them, the more experienced oboist may be able to help you diagnose the issue.
If you don’t have access to a more experienced oboist, try bringing your instrument to your local repair shop. The repair technician will be able to test the oboe for you to determine the problem.
If you’re not taking private lessons already, having a private teacher is a huge advantage. Your private teacher will be able to identify and correct any issues quickly, which will give you a much more pleasant and efficient learning experience. For help locating a private teacher in your area, reach out to Reed Supplies Canada as we have a database of private teachers across Canada!
Conclusion
I hope this guide has helped you pinpoint the problem, so you can get right back to playing your new instrument!
Band and orchestra teachers: be sure to share this guide with your colleagues.
Do you have any other troubleshooting tips for new oboists? Share them below in the comments!
0 comments